I set out to make what I thought would be a small version of a briefcase, and followed the basic pattern of a rectangular bag that was supposed to end up 13"W x 4"D x 12"T. I used 2 sizes bigger needles than called for which I now think was an error in the pattern anyway, but after I got into it I discovered that my gauge knitting in the round is a LOT tighter than flat. So I switched end use plans and kept going. It would be smaller, but good for another project I wanted anyway. Based on my swatch's felting behavior, I was estimating 10.5"W, 3"D, 7"T.
Unfelted, it was 14.5"W, 4.5"D, 10"-10.5"T when I quit and bound off.


When it came time to felt it, it only fulled after I thought it should have been well felted, so I started the cycle over again, now kicking up the action from "Normal" (slow/fast) to "Heavy Duty (fast/fast) which puts some seriously violent agitation inside that machine. I figured I had tons of leeway and I wanted it thickly felted, so ran it through the whole cycle, including the Cold Rinse.
However, the first cycle had kicked up the heat on the water heater, so I got some overkill. It came out only 5" tall! Omigod, we're talking a candy dish now.
I had to stretch the living crap out of this teensy bag to get even close to the height of my Buddy Case (6"), let alone the inch higher I counted on (7"). I mean some VERY serious felting took place which is what happens when you don't watch something and make a ton of assumptions.
LOTS of stretching. Getting closer, getting closer...

But now the size was all wrong in other directions, too, so it was looking like this bag wouldn't work for my revised plan either. So now, I squished it and shaped it in a zillion different directions. What could this become??
A fruit basket?
A hat??
Ah! A very cozy gonad-hugging urinal??? Of course! That's it! Eureka! Get the Chinese on it with a disposable, molded plastic insert and we can sell these in Beverly Hills for those horrid 45-degree days when there are actual clouds in the sky.

Finally, I abandoned my boring natural bent toward symetrical, and clipped the bag AROUND the Buddy Case. That had possibilities. Easy in, easy out, and a big remaining circular "basket-y" affair. I'm seeing keeper straps and needle keepers that were originally in my head might even work here.

All those tools are short and little. The biggie though? The Buddy Case HAD to fit in.


Well, the thing dried overnight because I'd had it in for the spin cycle also. Next day I actually started liking it as a freeform basket. But dammit, I really wanted to know if I could get that 7" of height!
I stuck it in a big pan of water, room temp, and left it there for well over an hour, probably closer to two. For water to penetrate this highly felted of a fabric, it would take some time.
Now I was able to get SOME stretch out of it, but at the same time realized that I had robbed myself of some height inherent in it because I over-extended the bottom which is not clearly defined. I made the bottom thinner (what I think is the real bottom) and between that and the huge amount of stretching/pulling for height, I got my 7" height.
No spin cycle this time, this time it's going to take DAYS to dry thoroughly. I'm betting a week. But now I can go back to my original plan. It's actually sized for two of the bags/cases I wanted now, so though less interesting, I'm likely to stick with it as revised.
SEVEN INCHES! Height. I really needed that extra inch. 10" wide and now 2.75" deep. Hey, I'll take it!!
Pockets, keeper straps, carry straps, magnetic snaps still to go IF I use it as a knitting gear storage bag. If for my other use, then just the magnetic snaps and carry straps left.

A lady on a felting forum told me that I can get a way better finished top edge if I use an i-cord bindoff. I checked youtube and the Judy lady has a video (love her stuff). It looks easy, so will be much preferable on the next one. Definitely there will be a next one!

STAGE TWO:
It isn't right for a banking bag, I've started another one for that, and in more businessy colors. I'm back to original idea - knitting gear bag, just not as big as I'd originally thought. But it's going to work for the one thing I wanted in the knitting gear bag -- easy access to my interchangeable tips.
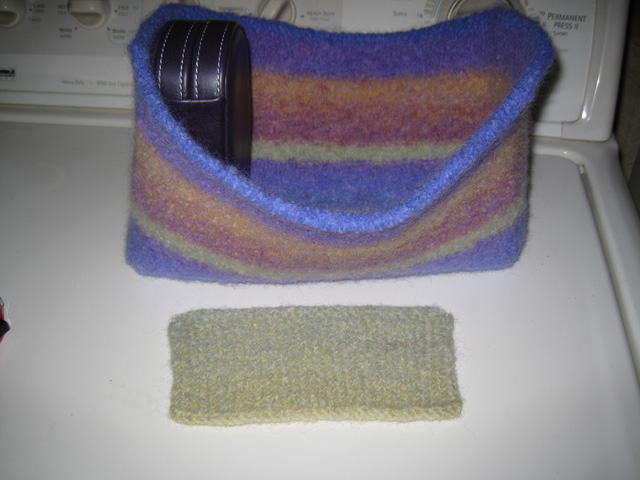
The Pocket: Not yet sewn in, I'm experimenting with elastic and not happy with what I have (I had to braid it), but it'll do temporarily. May revert to cutting slits but I really don't like that idea.

I have this first pocket pinned in, not sewn yet. But this is the general idea. (Cables in the pocket.)

There will also be a full-width pocket on the other side, divided in half or 3rds for structure and other smalls.
2 comments:
Beautiful! I didn't know you could stretch a felted bag, that's good news. I love the color changes. :)
Up to a point only! You can mostly re-shape what's there. If you stretch it taller, it will get narrower. But once those fibers are locked, you can't get a lot of more square footage. A tad, a tad.
Post a Comment