Saturday, April 2, 2011

Second Felted Bag - Yessssss!

I'm really happy with this one. It was knitted to be MUCH smaller (and stiffer!) but this time I babysat the felting process and it just might end up thick enough (stiff enough) to work as a disguised briefcase. If so, then YESSSSSSS!! (Much unbecoming fisting into the air).

What I started with - LOTS of knitting!!!

Finished Dimensions, unfelted:
16"W (not counting side panels)
7"D (duh... the side panels)
16"Tall, from bottom/side seam to top of i-cord bindoff.

Laid Flat:
22.5" Wide (includes half the side panels)
19.5" Tall (includes half the bottom section)

And here's what that looked like, spread out... LOTS of knitting!!


First Interim Felting Check: This is after 5 minutes.
It was still 22.25" Wide and 12.25" Tall, most of the shrinkage at this point having taken place in length. But the stitch definition is definitely blurred. This is "fulled" at this point.


Another 5 minutes (unfortunately photo taking forgotten) yielded 15"W x 9"Tall x 5.75"Deep. So now, in this second 5-minute session, I began losing width, but way more (waaaaay more) in height. On the needles, that would be your length.

Final Felting Session: Here's where I stopped. And this is PRIOR to shaping.
Dimensions:
14.25" Wide
8.5" Tall (Whoa! That's almost 50% and I think more time would have been more lengthwise shrinkage.)
4.25" Deep


RE-SHAPED (via pulling).... to be taller, which is at the expense of width.
Now reduced to 13" Wide
Now INcreased to 9.5" Tall (actual fabric, bends included)
4" Deep

As it sits on the table, it's effectively 9" tall but that's because of bends in the fabric not being counted. That's "table height" for lack of anything better to call its effective height, sitting.


New enough to felting, I'm not yet sure whether re-shaping holds, or whether in the drying things suck back into their out-of-washer dimensions. I hope it holds because I sure didn't get as much shrinkage widthwise as I'd counted on PER the ratio of lengthwise shrinkage.

This whole bag was expected to be 11.2" wide, 3.75" deep, and 7.5" to 9" tall (depending on whether to believe 40% or 50% lengthwise shrinkage). I am REEEEEALLY glad I babysat the felting and am really hoping this will stay stiff enough to serve as its revised purpose.

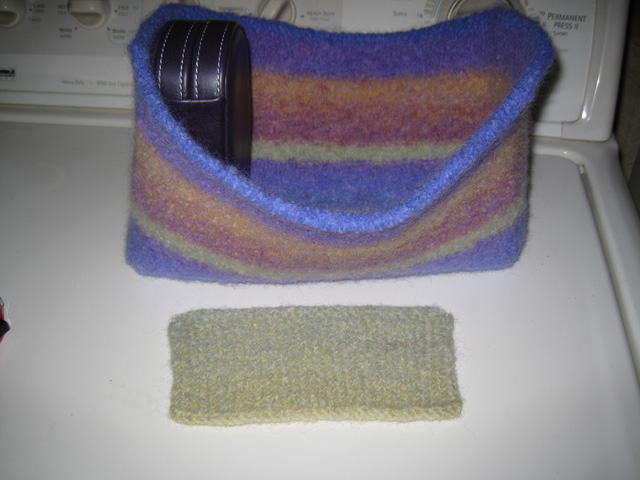
This photo is where you can sorta see the value of doing an i-cord bindoff which I had never heard of, but was suggested on Ravelry's felting forum by LisKnits. I found the i-cord bindoff to be NOT as easy as the tutorial video youtube had on it, BUT that's entirely because I knit so much tighter than Judy does in her video. This is definitely a finishing technique that's worth knowing about though. Enough so that I'm including a link at the bottom of this blog post for anyone who'd like to have it in their bag of tricks! For fronts of cardigans, for tops of pockets... endless uses. Judy's Tips video shows it up close at the very end of her tutorial. And I must say, her videos have never let me down, she's a really good teacher.


The proof will be in the wearing, but it does look to me as though this might work as a "prospecting briefcase" (which I do not want to have a business look to it. AT ALL.

Planned Strap: Shoulder strap, sewn onto each end. I might make it so it widens where it meets the bag and wraps all the way around, including the whole bottom. Might add outside pockets on each end (over the strap part that covers the body). I don't think I want to add any outside pocket to the front, I like the way it looks plain. VERY un-briefcase-y.

So that's it! As I say, LOTS of knitting, but this is mindless knitting in the round - good TV knitting. I'm super happy with the result AND with this yarn for a felted bag, thanks to Vicki in Indiana for having found it!

Here's the i-cord bindoff tutorial video. Is this nifty or what!!

LINK NOTE:
Well, I can't seem to link the i cord bindoff video! Go to youtube dot com, and in search box, type in " Knitting Tips by Judy: I cord Bind off "

Sunday, March 20, 2011

First Felted Bag / Case

I brought a horse friend over to the dark side (spin/knit world) who made a couple scarves, got bored with that, then wrote she'd seen a felted purse she loved, so she went for it. Her photos made me slather because I loved the slow color changing yarn she'd used as well as the bag. It made me think again about some special-use bags and cases I'm always grinched to be without, and her bag photos were my inspiration to try my hand at felting something other than a toaster pad.

I set out to make what I thought would be a small version of a briefcase, and followed the basic pattern of a rectangular bag that was supposed to end up 13"W x 4"D x 12"T. I used 2 sizes bigger needles than called for which I now think was an error in the pattern anyway, but after I got into it I discovered that my gauge knitting in the round is a LOT tighter than flat. So I switched end use plans and kept going. It would be smaller, but good for another project I wanted anyway. Based on my swatch's felting behavior, I was estimating 10.5"W, 3"D, 7"T.

Unfelted, it was 14.5"W, 4.5"D, 10"-10.5"T when I quit and bound off.


When it came time to felt it, it only fulled after I thought it should have been well felted, so I started the cycle over again, now kicking up the action from "Normal" (slow/fast) to "Heavy Duty (fast/fast) which puts some seriously violent agitation inside that machine. I figured I had tons of leeway and I wanted it thickly felted, so ran it through the whole cycle, including the Cold Rinse.

However, the first cycle had kicked up the heat on the water heater, so I got some overkill. It came out only 5" tall! Omigod, we're talking a candy dish now.

I had to stretch the living crap out of this teensy bag to get even close to the height of my Buddy Case (6"), let alone the inch higher I counted on (7"). I mean some VERY serious felting took place which is what happens when you don't watch something and make a ton of assumptions.


LOTS of stretching. Getting closer, getting closer...


But now the size was all wrong in other directions, too, so it was looking like this bag wouldn't work for my revised plan either. So now, I squished it and shaped it in a zillion different directions. What could this become??

A fruit basket?

A hat??

Ah! A very cozy gonad-hugging urinal??? Of course! That's it! Eureka! Get the Chinese on it with a disposable, molded plastic insert and we can sell these in Beverly Hills for those horrid 45-degree days when there are actual clouds in the sky.


Finally, I abandoned my boring natural bent toward symetrical, and clipped the bag AROUND the Buddy Case. That had possibilities. Easy in, easy out, and a big remaining circular "basket-y" affair. I'm seeing keeper straps and needle keepers that were originally in my head might even work here.


All those tools are short and little. The biggie though? The Buddy Case HAD to fit in.


Well, the thing dried overnight because I'd had it in for the spin cycle also. Next day I actually started liking it as a freeform basket. But dammit, I really wanted to know if I could get that 7" of height!

I stuck it in a big pan of water, room temp, and left it there for well over an hour, probably closer to two. For water to penetrate this highly felted of a fabric, it would take some time.

Now I was able to get SOME stretch out of it, but at the same time realized that I had robbed myself of some height inherent in it because I over-extended the bottom which is not clearly defined. I made the bottom thinner (what I think is the real bottom) and between that and the huge amount of stretching/pulling for height, I got my 7" height.

No spin cycle this time, this time it's going to take DAYS to dry thoroughly. I'm betting a week. But now I can go back to my original plan. It's actually sized for two of the bags/cases I wanted now, so though less interesting, I'm likely to stick with it as revised.

SEVEN INCHES! Height. I really needed that extra inch. 10" wide and now 2.75" deep. Hey, I'll take it!!

Pockets, keeper straps, carry straps, magnetic snaps still to go IF I use it as a knitting gear storage bag. If for my other use, then just the magnetic snaps and carry straps left.


A lady on a felting forum told me that I can get a way better finished top edge if I use an i-cord bindoff. I checked youtube and the Judy lady has a video (love her stuff). It looks easy, so will be much preferable on the next one. Definitely there will be a next one!


STAGE TWO:
It isn't right for a banking bag, I've started another one for that, and in more businessy colors. I'm back to original idea - knitting gear bag, just not as big as I'd originally thought. But it's going to work for the one thing I wanted in the knitting gear bag -- easy access to my interchangeable tips.

The Pocket: Not yet sewn in, I'm experimenting with elastic and not happy with what I have (I had to braid it), but it'll do temporarily. May revert to cutting slits but I really don't like that idea.


I have this first pocket pinned in, not sewn yet. But this is the general idea. (Cables in the pocket.)


There will also be a full-width pocket on the other side, divided in half or 3rds for structure and other smalls.

Tuesday, January 4, 2011

My New "Practical" Neck Warmer (Cowl)

Well, during my rash of dye testing, I kept gravitating towards blues, turquoise, a few purples, but ended up with enough dyed batts and locks so something could come of them. At the same time I was learning English Long Draw (requires hand carded rolags to get the real thing) and also Navajo Plying which turns out a 3-ply yarn instead of 2-ply. I tried spinning my singles finer, and there are lengths where I succeeded and did get a final yarn that was worsted weight, but because of the extra plump in yarn grist that Long Draw produces (which I didn't know to take into account), most of what I spun came out closer to bulky weight.

I ended up with approx. 103 yards of yarn from my Romney fleeces and 160 yards of yarn from the CVM/Corriedale Cross white fleece - all in the same colorway. I finally decided the CVM/Corrie (a next-to-skin fleece) would be great for a neck warmer and the Romney could be used for fingerless mitts, with either (or both if necessary) making a hat. I'm not sure I'd wear all three together because it's pretty 50's to be quite that matchie-matchie, but what else can I do with that much (or little) yarn? Not much. Small projects only, and I'd really like mitts in that colorway and I'd really like a hat in that colorway and... you get the idea.

I decided to start with the quickest and easiest "no brainer" where I wouldn't have to even look up a pattern. A cowl, or neck warmer, since I only have one. So starting with the CVM/Corrie spin (which ranges between 6wpi and 9wpi)...

What I wanted: A non-bulky, warm, cozy neck warmer that wouldn’t be tall enough to push up into my hairline but would cover my whole neck length, and with just enough “hug factor” not to let in cold air, yet not have so much as to be at all constricting; and then it would spread out wider as it went down onto my shoulders so as to lay flat under a jacket and not curl up. (Whew.)

What I got: Just exactly that. YAY!


At some point I'll take a photo with it on because it really does fit "right" and it's super practical, but I haven't gotten around to that yet.

How To: I made no increases in #stitches, but got the needed flare just by needle size changes. I can vouch for this with worsted weight/bulky weight yarn, but I don’t know if mere next-size-up needle changes would give enough flare using a fine yarn (your call on that). So these instructions apply to worsted or bulky weight yarn.

1. Do a good sized swatch in 2x1 ribbing (K2, P1) with the needle size that’ll give you a substantial fabric but not “cardboard stiff” given the yarn you’re using.

2. Measure your neck circumference under the chin and count stitches per inch from your unstretched swatch. Multiply out, and cast on that many stitches, rounded UP to the closest multiple of 3 sts. Do so using your method of circular knitting (or you could knit flat and join into circle with one seam), but DO cast onto 2 needles held together or onto a larger needle size so your cast on edge will have plenty of stretch.

3. In your swatch needle size, knit 2 inches in ribbing (neck/throat area). Switch to next needle size up and knit a third inch (collar bone area). Switch to next needle size up and knit a fourth inch (top of shoulders area). Switch to next needle size up (largest of 4 needle sizes) and knit 3/4 to 1 inch more, OR use 3rd needle size as I did, but knit with zero tension on yarn (super loosely). Bind off using Elizabeth Zimmerman’s “sewn bindoff” which is easy, fun, and a nicely-finished edge, but also it’s “the” bindoff for maximum stretch. (Do give a little tug against each bound off stitch as you drop it for max looseness.) That technique is shown on this (silent) video...


Ah! Here's another one (a "talkie") where she does show that little tug. She also says to leave 4x the length, so maybe I'm not the only one who's almost run out of tail yarn if she's a max-stretch-making tugger.


...and while EZ said to allow your garment’s yarn tail (what the video's star is sewing with) to be 3x the length of your bound off edge, I allow 4x because sometimes I’ve needed that added length, probably because I do tug against each stitch, whereas the demo in the video does not. But also because I'm a tad paranoid about running out of yarn in the middle of a bind-off.

You can do this neck warmer using 2x1 ribbing or 1x1 ribbing. If the latter, however, 1x1 ribbing has the most memory and hugs the most, so you would want to add one inch to your neck measurement, and of course you’d cast on an even number of stitches instead of multiples of three. (And I acknowledge that it's reeeeeally annoying when someone writes "of course" on something you may not have realized because you're a new knitter.) Also, if you want a real foldover turtleneck instead of single layer “mock” T-neck, knit 4 inches in your first needle size before progressing up. And finally, if you don’t want to knit in the round, you could also knit it flat with just a quickie 5” seam up the back to join.

Sunday, November 21, 2010

My 1960s Stove - Restoration Cleaning

Ohhh, man. Am I ever sold on power steamers! We have about a 275-year-old farmhouse that originally had no kitchen. Well, I take it back, the kitchen was in what we now call the family room. It has a huge fireplace with a swing iron that sticks out of the brick (it eventually fell out and is somewhere, I want to find it)! Beehive oven, the whole shebang. That's where the family pretty much did everything - hang out, cook, bake, and I'd bet that room saw kids playing games, mom spinning yarn and dad going over the books, or maybe playing a banjo if he was the type. The kitchen, as we know it, was either added in the 60s or renovated in the 60s. I can't imagine anyone living in this house in the 50's with no "today's kitchen," but who knows. At that point this house still had all its farm land, not a neighborhood like it eventually became.

Anyway, I suspect it was renovated then. But in any event, one of the things I loved about this kitchen was the stove. It's a "drop-in" with cabinets underneath. The whole stovetop and its 4 burners are in the form of a drawer! You can close that "drawer" and the stove front is even with the cabinets. You can open it halfway and the drawer sticks out into the room a little. You get 2 burners then. Or you can open it all the way, and you get 4 burners, and it sticks out into the room. If you cook a holiday dinner and you have gravy splatters all over the cooktop, whoooosh. You can just close the drawer.

Well, this stove has been in this kitchen since the late 50s or early 60s, best I can tell. And I've cleaned this sucker but there's just no way to get off 50 years of grease, etc. off the many (and complex) brackets and crevices that let a drawer slide out below, but also (it gets worse) - the oven doors don't open top-down, they swing out toward you, and slide up. We are talking a LOT of "bracketry" which, I think is a new word, as of now.

Two kinds of horribles. One is the baked on black, where you can't see the surface at all. The other is that tannish brown glazed covering that's sometimes dull, but sometimes also gets shiny darker brown spots on it. This had both.

Along comes a handyman I hired to do other things, and he brought over a unit made by Wagner - Power Steamer 705. The thing only costs $50 on Amazon, but ohhh man! Talk about effective! This whole stove is brushed or shiny stainless steel plus some black metal. Bakelite handles. You get the idea. Could be gorgeous, but after all these years?

I took the steamer to this stove, and it is a painstakingly slow process because you shoot a blast of steam, then go at it with SOS pads. But it worked!! Dang, I was seeing a beautiful surface under all that. And seeing my glee, the handyman saw the question in my eyes as he was preparing to leave, and said, "Hmmm, do you mind if I leave the steamer in your office? I'll need it tomorrow when I continue with your cabinets."

"Uhhh, okaaaaaaay. If you must."

These photos are the result of a cumulative total of probably 15-20 hours spread out over a week, and I'd guess more than that. Plus, I'm guessing 10 gallons of steam.

Mais voila!! (click twice on the photos and they enlarge)

Range top drawer closed


Range top drawer open to the halfway position


Range top drawer extended full kick.


Range top itself!


Bear in mind, I've gone at this top surface many times with just SOS and a whole lotta elbow grease. I wish I'd taken photos before, but there was a "permanent" circle of brown around the burners that no amount of rubbing could get off. It was in all those teensy microscopic crevices that brushed stainless has. With the steamer, that stuff melts! An SOS pad gets it off. Still need the patience, but you just keep seeing progress, and... well, you just can't stop until it's perfect.

Now I reeeally wish I'd taken photos of the brackets that swing out to lift the oven doors because two things. One, you can only get at all parts of it by working on it a section at a time (holding the door open just so far) and then go at it again (holding it open just a little more). These tan metal brackets had that impossible brownish shiny coating with the dark brown spots. Stem to stern! 50 years??

Voila a 3rd time.


Dang, I'm just so thrilled with the results that are possible with a power steamer. And what I discovered to be THE most valuable tool for getting into crevices, corners and teensy areas was a nut pick! The point is totally fine, but it's rounded so it digs, but doesn't scratch. So down to the nitty gritty edges, baked on grease, charred blackened areas where you can't even see what's underneath it... all G-O-N-E !!!

Apparently this stove has a small but devoted cult following. It's called the Frigidaire "Flair" Custom Imperial, and in small print on the front, it says "Product of General Motors." Well, I'm thinking they used the same chrome on this stove that was on the early cars (you know the ones, they were made of steel then, not freaking fiber glass and plastic!! Horrors, and I mean it.

My only concern is... one burner has a built in sensor. It senses the temp of the pot that's set onto it, and is supposed to self-adjust to maintain the temp you set. I wasn't going to touch that, I swore I wouldn't, but this morning lust got the best of me and I blasted that sucker with steam and SOS. At least the top of it. I'm figuring that steam can't be hotter than 212 degrees, and pots get hotter than that. Right?? Right??? I sure hope I didn't mess that thing up.

Monday, September 27, 2010

REVISED Fleece Scouring Method

I had one bag left. With a whole lot more than that, you kind of feel the need to chomp through it, but just one bag? After scouring three big Romney fleeces and two 8-lb. CVM/Corrie Cross fleeces? It's easy to shine it on. But it was becoming an eyesore because I couldn't just stash it somewhere (and forget it for sure), I had to keep it visible so it would keep staring at me. The "one last remnant" is really hard to get motivated about.

It did look like a good bag though, it definitely wasn't dregs. Somewhere around 4-6pounds, but a big bag. I decided to take some liberties with it and switch things up a bit, trying some of the things that had constantly occurred to me, but you know how it is, you read the same conventions everywhere, and you just follow them.

Never again! I'm only sorry that I didn't try this sooner.

No more lingerie bag washing for me. Not after trying it this way.

Fill your container with hottest tap water (I get somewhere around 125-135 degrees, hotter as I go). Put the non-enzyme Dawn dish detergent in it, enough so the water tints blue. Add fleece. But this time, I didn't use lingerie bags. I just plunked a big glob of fleece straight into the water. It floated freely. Lots of dirt, grease, what you'd expect. Except more than before, it seemed.

Scoop fiber out (the trick now is to not get only half, but the whole blob, because you don't want connected fibers pulling apart just over this).

Onto floor of sink, use a wooden cutting board or some other thing to press evenly downward to squeeze out excess soapy, dirty, funky, very hot water. No mushing side to side.

Into equally hot rinse water. Same exit, same pressing.

Into fresh equally hot rinse water. Ditto.

Toss the whole blob, intact, into a bucket and leave it there. Trick here? YOU WANT IT TO COOL ENTIRELY BEFORE HANDLING. (No hot fiber into spin cycle.)

Keep processing batches, keep adding blobs to the bucket to cool. Or take them outside. Just make sure they're cool.

Once cool? THEN pack them into the lingerie bags, and put through the spin cycle.

Doesn't sound very different? Well, it is. Scouring fleece in lingerie bags is just bad. Think of what happens inside the bag at every turn (literally). First, the fiber has nowhere to go, it's contained. So it compacts. Lock upon lock. Next, lifting that bag out of the water. No matter how gentle you are, you still have hot, wet, heavy locks that WILL shift around inside that bag. What's that the recipe for? Felting. Curling. Getting pressed by weight into those curls.

Variation discovered along the way: Line the vessel with tulle so you can lift out the fleece, rather than using a scoop colander.

Variation #2: (I liked this also.) After the fiber is totally (and I mean totally) cooled, do a final rinse, this time in cooler water. A little heat added, but not much. Cool fiber, cool water. Let it float around, and now you can swish it around also.

Cool fiber, safer handling in terms of contributing to the matting (which will happen, not might happen, with any handling you do while it's hot). The goal is the least amount of handling possible WHILE IT'S HOT.

NOW it's great to put it in lingerie bags. And into washer's spin cycle. Then lay it out to dry, as normal.

The final product doing it this way was
1. Lock structure preserved SO much better. Beyond just noticeably so.
2. Way whiter, cleaner (did I say waaaaay cleaner?) fleece.
3. Softer. No soap residue.
4. Tangle free, and I mean to the nth degree that wetted loose locks can be. Pretty much tangle free. I barely had to flick it prior to carding.

One thing I do know regarding human hair. When you wash it, in hot water, you are opening up the cuticle (scales). If you do a final rinse in cooler water, you close the cuticle. For one thing, you will damage your hair less, just in combing it, if the cuticles are closed (scales are snuggled down tight against the strand).

Same with fleece.

I've never seen a more gorgeous, clean, soft, shiny, tangle-free result from scouring fleece as I did with that last bag. I sure wish I'd departed from the "conventional wisdom" on fleece scouring a whole lot earlier, because this fleece is a joy to card. The other (all 5 fleeces) from doing it the conventional way, just doesn't hold a candle.

Friday, September 10, 2010

Turquoise-Periwinkle and Drum Carders

I decided to put my Strauch Petite drum carder to work and try processing some locks on it rather than combing. I also did some color blending on it. I'm not getting the effects I want for some reason with the latter, at least with this blending attempt. It's possible that's because the colors are too close for the to stand out. However, I'd also dyed up a bunch of misc. solids last summer, a lot of which were in these same colors, so even though those were combed, I decided to spin close to all I had, and Navajo ply it (also something that's fairly new to me).

Navajo plying is interesting. It's a way to keep color changes together when spinning from rainbow-dyed roving, but it took a fair learning curve. Whoever invented Navajo plying was a genius, or else she got tangled up at her wheel, and then discovered that if she spun the tangle, or part of it, her colors would stay separated and she could call it Navajo plying.

I learned the technique entirely from a youtube video. Thank God for youtube videos. I've been actually learning pretty much everything I know about spinning techniques on youtube videos. Here's the best one I found on Navajo plying, by Sarah Anderson, with good sound, good photography and clear, concise instructions.

Unfortunately, my first skein in this colorway and technique, I spun the singles so that with 3 ply (Navajo), it ended up as a heavy worsted weight. On the next little skein, I narrowed down some (23 plyed yards) and got more of a regular worsted weight, bordering in some places on finer. Then what I did today, I narrowed up even more, and although more consistent, it's looking like this little skein (56 yards) will almost be a DK weight. That's an odd breakdown, but once I figure out about how many yards a hat will take (forgot), I think that's where I'll go with it. I like both the colors (a periwinkle wannabee and a turquoise), and I'm totally open to doing a scarf or cowl in the same or pick up one or the other colors, but spin it out of the CVM/Corrie mix breed fleece I have, which is definitely next-to-skin wool.

So here's what I ended up with (2 of the skeins, today's is soaking to set the spin).


I'm sure glad I'm not yet sick of this colorway, or either part of it, because Monday, Labor Day, my spin group had their annual Dye Day, and they were trying out their brand new humungous dye pot (it does pounds, and pounds at a time, a gigantic shiny stainless stand-alone pot, 2-3 ft. deep, mounted on its own burner). What color did they put in it, for everyone to dump whatever yarn or fiber they wanted into it? Turquoise. I stuck in 5 oz. of really nice grade locks from my Romney fleeces, or maybe it's more. Still unprocessed (not sure if I'll card or comb), but it's turqoise. Or maybe closer to Aqua. But at least it'll fit in, that's for sure.

I still have quite a credit balance at a LYS, and have had this huge flirtation with a Louet Jr. (roving carder - narrow drum) so bit the bullet and ordered one. A 4" wide drum, the teeth on the Louets are longer and of all things, flexible. They intermesh also. A totally different animal than my Strauch. It'll be interesting to see how that fits into my world. I don't know yet, only that I just couldn't seem to get that particular carder out of my head. That's what trade arrangements are all about though, yes? Buying something you couldn't justify otherwise.

Thursday, August 19, 2010

E-reader Mecca for Knitting!!

As a newbie to the e-reader/ebook/audiobook world, I had bought a Sony Touch locally, with a 30-day return policy in case I just didn't take to e-reading. Well, I did take to it, but with further research, as of yesterday I was going to take back the Sony and go with the Kindle. I didn't think much about the annotation feature that Sony has, but then yesterday I really started looking at that.

Whereupon the whole ball game took a turn.

I'm falling in L-O-V-E with the Sony Touch e-reader. While its screen needs the right lighting for optimal reading (a trade-offish fact of life with a "Touch" screen), what I've discovered is that the potential of the Sony Touch's note taking is phenomenally suited to me as a knitter!

It all started when I downloaded Berroco's free Nimbus pattern into it. Well, I don't know about other knitters but I've learned that before I even start knitting something, to go through the pattern and circle all the size-related instructions because... (yup, I have done that. Twice. It's a mistake I don't want to ever make again. I've learned to circle all size-related stitch instructions).

So here's what the Sony Touch Annotation features will let you do. From within the reader. On the pattern page itself.

NOTE: Screen looks way worse in photos than it is. Photographing my very clear, crisp Samsung TV screen does the same thing.


While at marking up the page, since I'm not yet used to the upper right corner "dog ear" icon signifying that Bookmark Notes exist for that page, I drew two big arrows pointing to the icon. In other words, you can circle text, write in margins, cross things out as you knit them... there's unlimited, endless flexibility. You can mark or write with your fingernail but a way more civilized stylus comes with it, and Sony placed it in a totally secure, very accessible slot.

Now, page 2 of this pattern was blank. What a perfect place for a sketch! So I drew a sketch on it.


But then I also wanted to try out the Bookmark Notes feature, and this time, use the keyboard. (Bookmarks can be brought forward by a soft tap on the dog-ear, then whooshed away again by a soft tap on the X box.)


You can also draw on the bookmark notes page. That or the keyboard, you have that choice.

So the usefulness of the entire annotation scope of this Sony Touch, to me, is fast becoming a dealmaker/dealbreaker thing. As a reader, not so much. As a knitter? Indispensible.

As for e-readers in general, I'm totally sold on them. You bring this one unit with you, and you have your pattern(s). You have your book(s). You have a stitch dictionary perhaps. This particular unit also reads Microsoft Word files, so what the hey, you might have a draft of something you want to keep working on. Have Touch/Stylus, will travel. Each brand of e-reader has a different amount of storage space built in. Sony has a respectable amount, but. BUT! It happens to also have two slots for SD cards. The normal camera type... up to 16 Gigs! I don't know how much the Duo Stick card can have, I didn't care at that point.

Finally, as some e-readers go, and the Sony Touch is one of them, if you want to listen to music or an audiobook while keeping any of those things on the screen? No problem. It's also an MP3 player. (And with 16G+ of storage space)... EGADS!

Kindle is coming out with a new generation, and there's no question its screen is going to be better. Its current model already is. But the more I've learned, the more I've found that I'm just a tad bugged by Amazon's proprietary format limitations. The one downside to this Sony Touch is that it's lacking in screen contrast definition, and the Touch Screen technology adds inherent glare. But hey, for me? As a knitter? For someone who wants to jot notes on things? The annotation/drawing potential that this thing has... it's just way too compelling. As for the screen issue, Sony makes an e-reader cover for it (opens like a book) that has a convenient, although not perfect, light built right into it. The Kindle has one of those also, but the Sony needs it in some lighting. I've learned to position it so there's no glare (a fiddly process currently, but I will get better at it) but it definitely helps the dull contrast issue.

So that's that. Whether I keep this one or return it and wait for Sony's new generation (which is rumored to have everything this does but improved screen contrast is hoped for), I don't yet know. I'll probably have to make up my mind before the new model comes out. But I'm definitely going with the Sony. The annotation feature (which had sounded so "pfffft, meh" to me as a book reader), is now a deal-making feature for me as a knitter. It's pretty much become a done deal.