Tuesday, August 4, 2009

Conclusions (Dyeing home-combed, dizzed top)

My dyed slivers from yesterday dried, and I just spun some from that lot AND some from my first lot, all in compatible colorway. I not only wanted to test spin what I dyed yesterday with the new step added to the home-combed top before dyeing, but also spin some of that and some from the lot before that didn’t have the extra step, to get a total on-the-spot comparison.

HUGE difference. HUGE. To keep it straight, the first lot of hand-combed, dizzed top I dyed, I just put my fat, airy slivers (and wrapped "airy" into bird’s nests) into mason jars “as is.” The second lot, same size bird’s nests, I first unwrapped the nests and re-wrapped them into new bird’s nests, but this time pulling steady tension on the fibers (staying within staple length, but pulling pretty firmly) in order to smooth it out and make it more dense.

In spinning the first day’s lot… definitely some felting went on in there. I can pull it out, it’s not that much felting, but I do have to pull it out as I’m spinning. I had to use a much longer draw. The second day’s lot? It was practically like spinning commercial top! It slipped through my fingers, I didn’t have any sense of tangled fibers within. Spun smoother. And easier.

So for me, I am now pretty willing to go ahead and comb undyed fleece and dye it after. But for sure, use a large-holed diz (maybe even larger than the 3/16ths hole) and even though it's typically super airy, THEN wrap it into bird’s nests with tension on them. I mean, when I re-wrapped those slivers around my fingers yesterday, I did not wrap loosely like you normally would a totally airy sliver. I wrapped it tight, so I was dealing with quite a solid density of fiber. I mean, there was actual shine to it.

Here are some photos. I think you can see the difference.

The two together outside


The two together, different light, inside
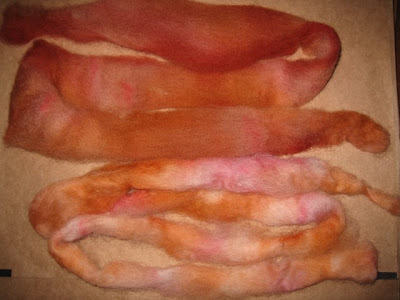

Here's a close-up of the 1st try (with the fiber left airy, right off the diz but bird-nested before putting into mason jars).


First of all, the above ended up drying as WAY thinner top than it started. (These are exactly the same sized diz-ing). What happened, I'm convinced, is that by NOT pulling it into a denser, condensed sliver, it did its own condensing in the dye bath. That enabled the fibers to hug together however they landed. And, of course, it dried in the same self-condensed form it took condensing on its own when floating in the dyebath water. The result was, in effect, some felting.

Now here is a close-up of the 2nd try. Any condensing that was going to take place, I did prior to putting those bird's nests into the mason jars and pouring the dyebath into them (same exact method as above). I did not do any attenuating! I simply pulled the sliver flat and smooth by staying within its staple length as I RE-wrapped it from its airy bird's nests into smoother, condensed bird's nests.


Closer... As it dried, it fluffed right back up BUT! with the fibers still aligned.


Closest. You can see the alignment of the fibers here. Pretty darned straight! The fuzzy part you see here is not felting, just a thinner spot or an end. This spun up like butter!


Color Variation for blending 3 colors together:
Since I did get way too little color variation (used 3 colors just like originally on Dye Day (see that post) when I was using commercially-combed top, this could be due to one of two things. First, I used more dye powder here than I should have, that can cause mud. But secondly, and I'm sure this had something to do with it even if the dye amount was too much... it's standing to reason that if you want a blended multi-colored top out of mason jars (as opposed to the colors just mixing) then I already know you have to pack the jar pretty tight. Well, with hand-dizzed top, even if you condense it as above, it's STILL going to be a looser, less dense top. So that's telling me that MANY bird's nests have to be crammed in that jar, one on top of the other... like a LOT. Whereas with commercial top, you can pack it so a poke has one degree of resistance, it'll take some experimenting to get the same amount of fiber packed in with hand-dizzed. I'm now thinking to help in that, it would make sense to wad some screening onto the very top of these hand-dizzed bird's nests to hold them tighter than I suspect they'll be able to remain otherwise. I know that on both days' experiments, when I was done steaming, the fiber was popping out of the jars somewhat. That didn't happen with the commercially combed top. It started dense, and just got denser when wet. So something artificial added has to hold this down tight. A pusher of some kind.

Monday, August 3, 2009

Dyeing hand-combed, dizzed slivers

I used a 3/16-inch holed diz for the undyed slivers. Fat slivers. Still airy as is typical of non-commercial combed top, but I do put an ever-so-slight twist in them when I wind them into bird's nests. These happen to end up about the same or a little larger diameter as a quart size mason jar. (If using 2-3 little piles of dye in the mason jar, use small-mouth jars). I just stuck one in on top of the other and pushed them down. In this case, I packed a little too tight because I do have some white areas, but I'll take it. It's okay for a first try.

One thing I'm discovering TODAY (after the fact) and it surprises me I didn't notice this before. Hand-dizzed slivers are so airy that they look extremely delicate. Well, they ARE. However, that's in their airy virgin, untouched state, right off the diz. Once you start bird-nest wrapping one, however, if you stay within the staple length with your wrapping hand (the wrap-OR, not the wrap-EE) you can put a fair bit of pulling pressure on that sliver and make it a LOT more dense!

Yes, I did get some extremely minor "felting" action, but very minor. I'm now thinking that if I bird-nest these little suckers with that pulling pressure on them I discovered this morning, then the sliver itself will be way more dense and a lot tougher under the stress of dye-handling. In fact, I'm going to experiment with this pulling more. It was almost feeling as though if I were to pull a little more, it wouldn't drift apart (the big fear) but it would smooth out and just be a whole lot more like commercial top. Or let's just say a worthy step, at least, in that direction.

Whoa! This photo picked up a whole lot more saturated color appearance than I got. The real top is actually more caramel color base, then take it from there. Nothing in it is this INTENSE.


This is the relative size of my slivers. These happened to have been dyed in the fleece state, then combed, but size is the same.


The perspective is off. These look smaller than they are. Some of them actually are smaller. The big one is more like my typical size. This is in its fluffy wrap state, I hadn't discovered the pulling and smoothing capability yet when I wrapped that one.


By the way, these colors were under-saturated hues of Teal Blue, China Jade, Blue Spruce and Avocado (Country Classics by ProChem) in the order of intensity down to lightest color, with only one small bird's nest of the Avocado combed so far. All done in mason jars, then steamed in a canner. I'm thinking these alternated in the spinning, then the single plyed on itself however it lands (not Navajo only because I don't know how to do that yet) will make for some pretty yarn.

***** SECOND TRY ******

1. Full Intensity Saturation - same blues and greens (one color each jar)
2. Tried again for target rust/caramel/yellow colorway
3. This time I unwound my bird's nests from their fluffy wound state and re-wound them, pulling the fiber MUCH tighter and smoother so it would be more condensed. (This is a matter of starting out with fat slivers to begin with, dizzed as densely as I dared without causing a bottleneck bunch-up, then holding hands close enough together not to violate staple length, pulling the fiber tight and smooth, and re-winding into far more tightly condensed bird's nests.

Wet "blobs" - VERRRRRY little handling at this stage. All I did was plop them into the salad spinner, then took the picture.


After salad spinner -- It just naturally separated into sliver form. Still want to handle this very carefully. But it does stay together in sliver form! Yeeehaw.


It lets you carefully pick it up, drape it on a hanger to dry, and stays together. This whole trial WITH the bird's nests re-wrapped so the fibers were pulled tighter really seems to be a whole lot better. The fibers within the sliver were definitely less disturbed. Note even the parts where you can see the white hanger showing through. Those were likely thinner to begin with, but yet there's still integrity there.


Here was my setup (only workable in good weather obviously). What I didn't move off the forward bench were a container of inside/outside ant spray and another like container of weed killer. (Those are not dye equipment.)